Click Here For Free Blog Backgrounds!!!
Blogaholic Designs

Tuesday, May 31, 2011

Winner, Winner, Tuscan Garlic Chicken Dinner

I came across this recipe several days ago while blog-hopping. Any recipe with the words “Tuscan” and “garlic” will immediately grab my attention. In reading through the ingredient list and preparation steps, there were a couple of ingredients I didn’t have, and one I knew I couldn’t use if I wanted Greg to eat it, so there was a little tweaking going on as supper was prepared a few days ago.

I knew he’d never eat cooked spinach – I’ve asked a few times when wanting to make something like this. So that part was out. Instead, I steamed some frozen asparagus as a side dish.

I also wasn’t about to give the appendage required to purchase a red bell pepper at the grocery store last week, so that got left out. When pepper prices come down, or I have my own from the garden, I’ll make this again, because the red pepper would have been really good here.

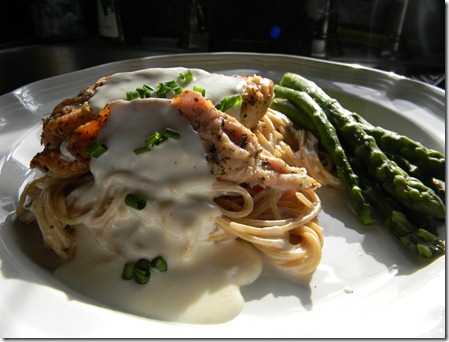
tuscan garlic chicken

Here is the original recipe, with my changes in blue.

Tuscan Garlic Chicken

(www.thefarmgirlrecipes.blogspot.com)

3/4 c. all-purpose flour

1/2 T. salt

1 t. pepper

1/2 t. dried basil (I used Italian seasoning)

1/2 t. dried oregano

4 boneless, skinless chicken breasts

5 T. extra virgin olive oil, divided

1 T. finely minced garlic, 4-5 cloves

1 red bell pepper, cut into thin strips or chopped (left out)

1/2 c. low-sodium chicken broth

6 oz. fresh spinach (omitted)

1/2 c. heavy cream

2 t. cornstarch

1 c. milk

1 c. freshly grated Parmesan cheese

1 pound fettuccine (or whatever pasta you have on hand) (whole grain angel hair)

1.  Preheat oven to 350 degrees.  In a shallow pie plate, combine the flour, salt, pepper, basil and oregano. Dip each chicken piece in the flour mixture until both sides are well coated.  (note: if your chicken is quite thick, butterfly them so they are thinner)

2.  In a large 12-inch nonstick skillet, heat 3 tablespoons of the olive oil over medium heat until the oil is hot and shimmering. Carefully place the chicken breasts in the pan, cooking them for 2-3 minutes on each side, until they are golden and browned but not cooked all the way through, they will finish up cooking in the oven. (note: don’t move the chicken around once you lay it in the hot oil! Let the oil work it’s magic to sear the crust on the chicken. If you get all antsy and try flipping too early and/or moving the chicken around the pan, the breading will likely fall off) Gently remove the chicken to a foil-lined, lightly greased baking sheet and bake in the preheated oven for about 15 minutes, until the chicken is cooked through. Set aside and tent with foil until ready to use.

3.  While the chicken is cooking, heat a large pot of water to a boil and add the noodles, cooking until al dente. Also, wipe out the skillet with a couple paper towels and return it to medium heat, adding the remaining 2 tablespoons olive oil. When the oil is hot, add the garlic and bell pepper, sauteing for 2-3 minutes.

4.  Stir in one tablespoon flour and stir constantly while cooking for another minute. Add the chicken broth to the skillet and bring the mixture to a low simmer, whisking constantly, until slightly thickened, about 3-4 minutes. In a small liquid measure, whisk together the cornstarch and cream, and milk. Add the spinach, milk and cream mixture to the skillet. Bring the mixture to a simmer and cook, stirring occasionally, until the spinach is wilted and sauce is slightly thickened, about 2-4 minutes. Stir in the Parmesan cheese.

5.  When the pasta has finished cooking, drain and return it to the pot. Toss the pasta with half of the cheese sauce. Place some of the coated pasta on each plate. Top with a breaded chicken breast and spoon some of the sauce over the top of the chicken and pasta. Serve immediately.  Enjoy!

This was really, really good. The chicken is tender and flavorful, the sauce is garlicky and smooth. I use angel hair pasta for dishes like this – I like the delicate texture.
Monday, May 30, 2011

New from Old

Good Monday Morning! I’ve so enjoyed having Greg home for this long weekend. He took Friday off from his job which gave him a four-day weekend. We’ve completed a few tasks and had some fun as well as some good family time. make_do_and_mend

Ah, but that is not what I want to tell you about today. Besides being  Memorial Day, it is “Make Do & Mend Monday” where my friend Heidi encourages us to make-over, re-cover, re-invent, re-purpose things we have around our homes to make them useful and/or beautiful again. I have a few of these types of projects in the works around here, but my first was relatively quick and simple.

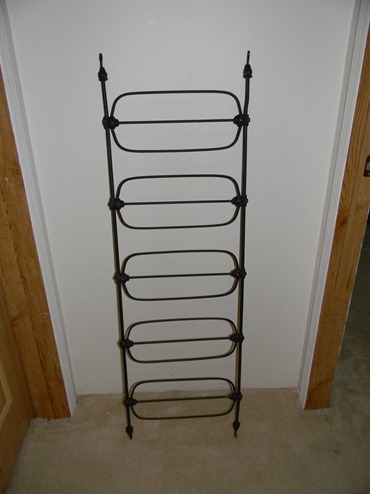
A few years ago I was gifted an old iron crib that belonged to my grandparents. It was used for awhile as a daybed/display area in the master bedroom, but it really took up more space than we liked, so I disassembled it recently. I’ll make use of all of the pieces, but one of the sides has become something completely new.

Here it is, standing on end. Do you see what I see? It would be a great place to hang more towels in the bathroom!

05-30-11 034

There is little storage in this tiny bathroom, and while I would like to put in a cabinet for towel storage, it just would crowd the room more. There is also a “regular” towel rack on the wall, but it doesn’t hold all of the towels I want to store in that bathroom.

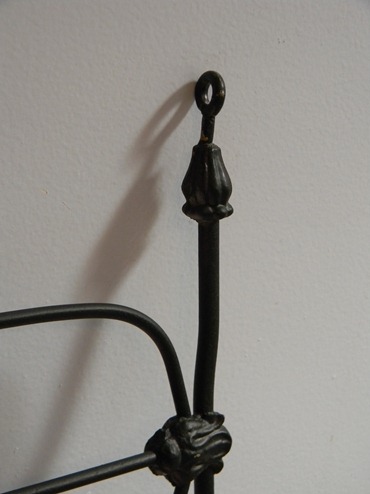
As you can see in this next photo, the ends of this piece have a small “loop” and you would think that would make it easy to mount on the wall:

05-30-11 039

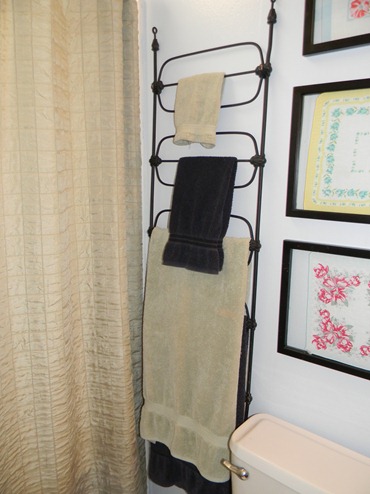
The problem is that it is turned the wrong way to hang flush. I considered using several options, and decided to just put hooks in the wall and hang it from the frame instead.  Those yellow arrows are pointing out the hooks that I hung it on.

image

You can’t even see them. I think this is the smartest way to hang it, too, since once the towels are hanging there, it is heavy.

I really like the way it looks!

05-30-11 044

Incidentally, those hankies in the frames next to the crib piece, belonged to the same grandmother. I love having little pieces of her in my home.

If you click on the link above or the Make Do button, you’ll go to Cranberry Chronicles where Heidi has listed more Make Do & Mend participants in the right-hand column. I “know” all of these ladies and they are all resourceful and talented in using what they have to make their homes cozy and welcoming. Go see what they’ve done and then take a look around your own home. What can you make new again?

Friday, May 27, 2011

Rainy Day Play

One of Bradley’s favorite activities is to play in anything he can scoop and pour and stir. I’ve talked before about making colored rice and how much he enjoys playing in it. I’ve always set him up at the table in his booster seat and given him a cookie sheet as a play area. The other day, I put an old tablecloth on the floor and set out the rice and various “tools” there instead. This became a combination small/large muscle activity as he played and crawled around the tablecloth.

Yes, I still vacuumed up some of the rice, but it wasn’t bad. It’s pretty easy for him to help clean up the rice that ended up on the tablecloth.

Here’s a little video of him playing. As usual, I talk to him as he plays, describing what he’s doing, always working on those language skills.

I love the look on his face at about 1:36 when I’m talking about him taking the lid off and putting it back on the spice bottle. Like he’s humoring me that he’s done something neat and unexpected.

Monday, May 23, 2011

Veggie Nuggets

I know I mentioned in a previous post that I was going to try to sneak some veggies into Nick’s diet, and these would be a great way to do that, if I could convince him to eat them. I’m afraid they’re a bit too obviously veggie.

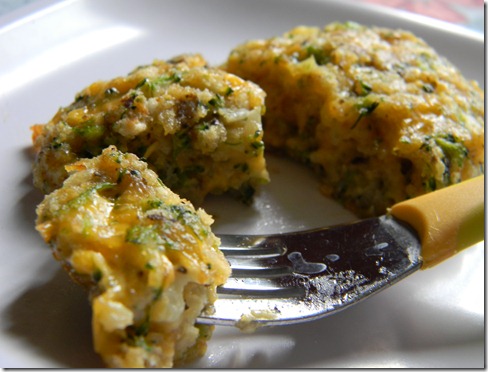
Oh, but they are delicious! You can find the actual recipe here.

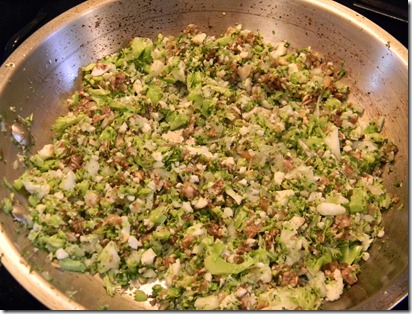
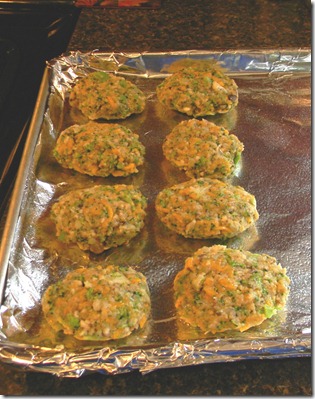
I used some fresh broccoli, cauliflower, mushrooms, and a little onion for the veggies. I had homemade bread crumbs made from toasted garlic bread, but not enough quantity, so ran some Panko through the food processor to make up the difference.

First I ran the veggies through the food processor, then sautéed them in batches for just a few minutes in a tiny bit of olive oil.

05-17-11 019 

After sautéing, they went into a bowl to cool momentarily before adding the crumbs, eggs, and shredded cheddar cheese. There was a good quantity of vegetables, and after two eggs the mixture was still a little bit dry, so I added a third before shaping them into large-ish nuggets. I got an entire sheet cake pan full of them. You can make them smaller if you like.

05-17-11 021

After baking, Brad had one for lunch. He liked it, but once Jess gave him some Ranch to dip it in, he devoured it!

05-17-11 022

There are so many variations to try – zucchini and yellow squash, shredded carrots and peas, green peppers/onion/mushroom. You can vary the cheese, too, for a different spin.

These were bagged up after cooling completely and put in the freezer. They warm easily in the microwave or toaster oven. They’re really handy to have in the freezer for a quick lunch side dish or a snack for the little man. Or his mama.

She’s eaten as many as he has.

Friday, May 20, 2011

Hot Wheels

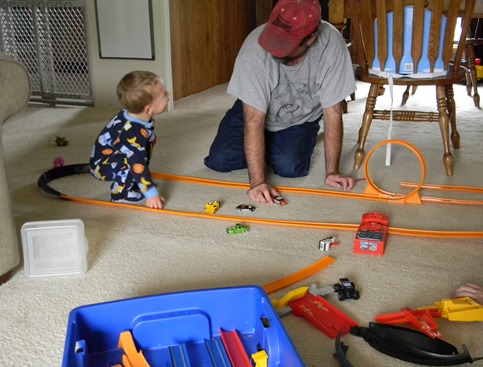
Last summer Jess found a big box of Hot Wheels tracks and cars at a garage sale and called me right away to see if I wanted it. I was thinking the Wyatt and Garett would enjoy it, and they have.

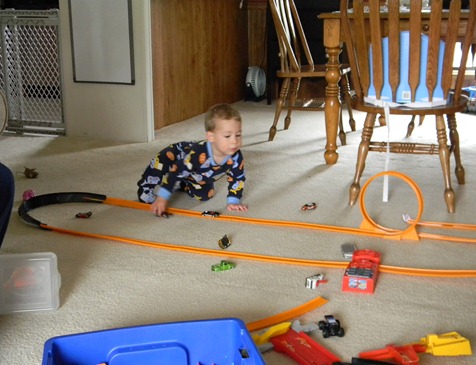
Bradley has loved Hot Wheels and Matchbox cars since he was big enough to recognize that they’re cars. He plays with them every time he’s here and has his own collection at home. The other day when he and Jess were here visiting, he brought out the box of tracks, and Jess set it up for him.

05-17-11 025 

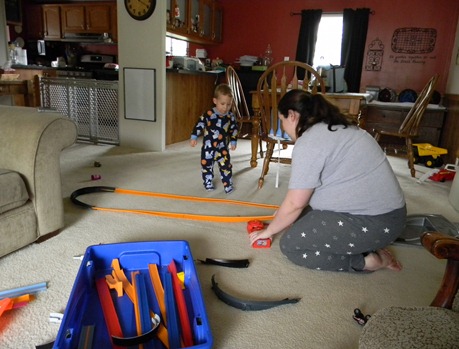
She figured out a simple oval track for him to play on, and is fitting in the battery-operated “booster” thing that shoots the cars down the track. He likes to bring that out to the living room and we shoot the little cars all over. :o)

05-17-11 029

It wasn’t long before Grampy came in and joined the fun. Jess happily gave over the track duties to him. After a little sorting and revamping there was a loop so the cars would shoot around and go upside down. Bradley loved that!

05-17-11 041


05-17-11 038

What fun to watch them playing cars together. Somewhere in the car collection is one that Grampy played with when he was a boy, as well as some that belonged to Uncle Nick. I love that Bradley is able to play with their old toys!

Wednesday, May 18, 2011

“Food That Doesn’t Suck”

There is a recent situation in our family that dictates a bit more thought about our menu and method of cooking. Our son was diagnosed with diabetes over the weekend, and while he has no diet restrictions, there are guidelines for what and how much he eats so his insulin level and blood sugars stay balanced. Because he was so incredibly ill when he got to the hospital, he got low-sodium meals, which, let me tell you, DO suck. His discharge papers listed “no diet restrictions”, so this mama has been trying to fill him up with delicious food that follows the diet guidelines he was given. I don’t usually cook for him on a day-to-day basis, but he’s staying here for a few days as he adjusts to the new parts of his daily routine. 

The title for this post comes from his comment about his supper last night, his first meal outside of the hospital in four days. When asked how it was, he said, “This food doesn’t suck!”

Tonight’s supper was one we discussed in the hospital and he’s been looking forward to for a couple of days. My boy (well, he’s 27 years old, but he’s still my “boy”) is not a veggie lover. That’s really an understatement – he’s a veggie hater. I will confess here, because he does not read this blog, that I intend to try to sneak some new-to-him vegetables into the food I make for him. We’ll see how that goes…

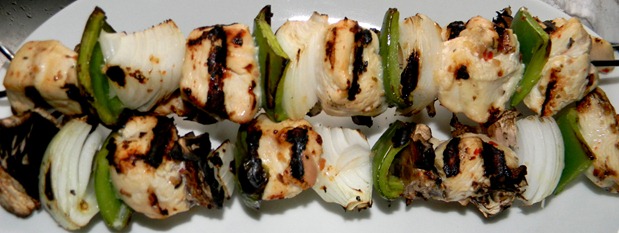
Anyway, back to supper tonight. He hates veggies, but will eat peppers and onions. Think, fajitas. Fajitas are delicious, but I wanted to do something a little different. So we planned chicken kabobs.

kabobs

Really simple – pieces of green bell pepper, chunks of onion, and cubes of boneless, skinless chicken breast – all marinated in fat free Italian dressing. I added pieces of portabella mushroom to Greg’s and my kabobs, too. A few minutes on the grill and we had a simple, tasty, nutritious meal that didn’t suck.

Sunday, May 01, 2011

“Sleeping In”

porch flowers 012a

Tomorrow morning the alarm will go off, and it will only go off once at 6:00. NOT at 4 a.m., then again at 6. ONLY at 6! Yea!

After three years and seven months of getting up at 4:00 every weekday morning, I resigned and finished up my last early morning on Friday. I’m so excited!

This was an easy job and I so very much enjoyed the people I got to know. What a blessing it is that I was able to work just part time and then spend the days with my grandson. But I’m tired. Exhausted. Fatigued. It’s time to catch up on some sleep.

For the moment I’ll watch Bradley when Jess needs me (she’s between jobs and is going back to school – yea!) and then when our second grandboy arrives in late July, they’ll both be here as needed. That’s all I know so far about what I’ll be doing for the next several weeks.

Oh, and Spring cleaning. And painting. And gardening. And sleeping in.