Click Here For Free Blog Backgrounds!!!
Blogaholic Designs

Monday, December 12, 2011

Season’s Greetings on the Front Porch

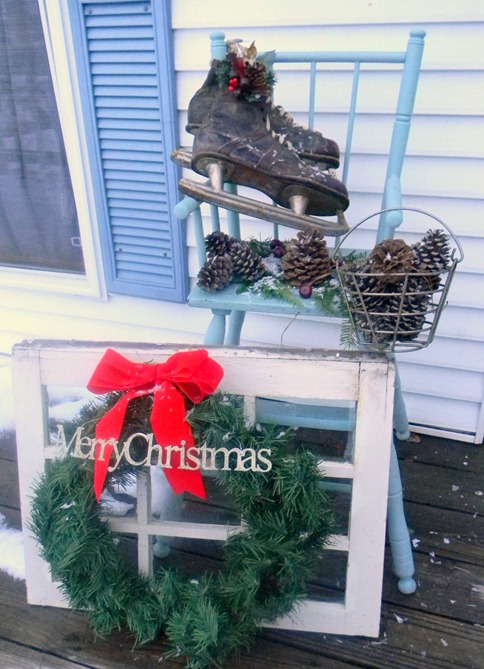
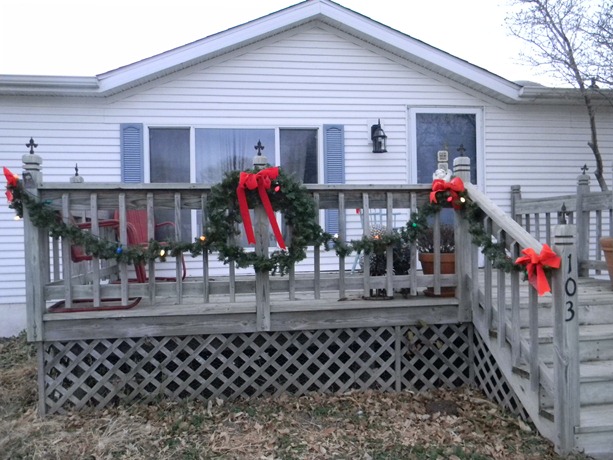
make_do_and_mend After hanging garland and a wreath on the front of the deck, I pretty much blew off any more outside decorating for awhile. I got back to it yesterday, but it’s taken more than 24 hours to come up with the final display to greet visitors. In case you can’t stop by and say hi this holiday season, I’ll show you how it ended up.

It started with a few evenings of perusing the interwebs, looking at blog posts and photos on Pinterest for inspiration. I was really liking the simple, natural displays.

I gathered an old window that had been tucked away in a corner in the den, a faux greenery wreath, and the old high chair I painted and put on the porch last summer. This afternoon I shopped the house and was happy to find Dad’s ice skates hanging by a nail on the closet wall. There was a wire basket from Goodwill, a bag of pinecones the in-laws brought back from Texas in the Fall, and some random decorative “stuff”, and I was set. I love the layers, yet it’s simple and, I hope, welcoming: 

DSCN1881aaa

From our house to yours:

Merry Christmas!

(This post is a Make Do and Mend Monday project!)

signature

Friday, December 09, 2011

Popcorn Ornaments

I made these fun glass popcorn-filled ornaments a few years ago to hang on the Christmas tree on the ticket counter at our local movie theater. The theater manager donated some boxes of old candy to add some color. This will be the fourth year they use them – they’re holding up wonderfully.

The customers just love them, and each year several of them ask what the secret is to getting the popcorn inside.

I'm going to share that secret here with you:


Supplies:

clear glass ball ornaments

unpopped popcorn (don't use the pre-packaged microwave corn that includes grease)

microwavable dishes

hot pads

First remove the metal top on the ornament and set aside. I rinsed the glass balls with vinegar and water and let dry overnight.

Put popcorn kernels in the ball - the amounts I used varied with the size of the balls. I think I counted out between 40-60 kernels per ornament.

Set the glass ball inside the microwavable dish. (Some instructions I've read say to use a paper bag, but that didn't work so well for me. Plus, I like being able to see the ornament and monitor the popping of the corn.)
Microwave on high until the kernels no longer pop. Each microwave is different, so I hesitate to put a length of time in my instructions. I just watched and listened, and when there was a count of 10 after the last pop I heard, I removed the ornament.

Keep in mind that these dishes and ornaments will be HOT when you remove them from the microwave. Use the hot pads and let everything cool before you handle them. I also had to take a few breaks and let my microwave cool off. Be warned, also, I did have a few of the glass balls break. Have some extras handy and please HANDLE WITH CARE.

Once they're cool you can shake out any unpopped kernels, then put the metal hanger back on and embellish as you desire. We added colorful candies from the theater concession stand, and hung them using ribbons.

These are an easy way to have somewhat old-fashioned decorations on your holiday tree, with a modern-day twist. Enjoy!


signature

Thursday, December 01, 2011

Decking the, um, Deck (Make Do and Mend)

I did this project on Monday, which was Make Do and Mend day. Some of my other online friends post their projects, too. Just check Heidi’s blog for a list.

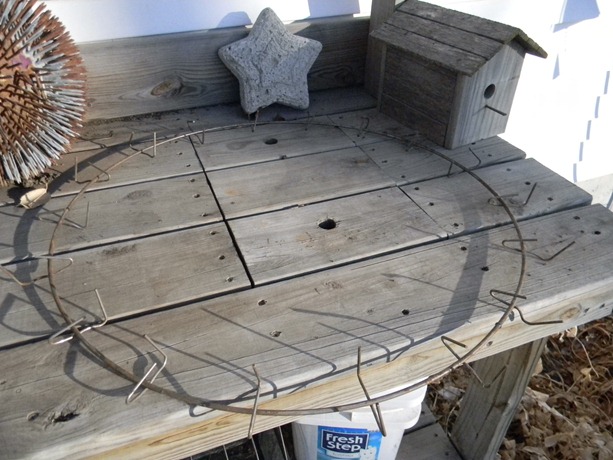
This one was easy and (almost) a no-brainer. While Greg’s niece Hannah was in high school, she sold greenery every year for band fundraiser. I always bought a large evergreen wreath. Now that she’s graduated, I don’t get my pretty wreath each year. I was thinking about that the other day, and remembered that I’ve kept a couple of the wire forms from them.

DSCN1762

I dug one out of the garage at great risk to my well-being since it was hanging on the garage wall, under pieces of chicken wire and the rotisserie for the grill – all of this behind the bicycles – it was a trick to get the wreath form down without everything falling on me!

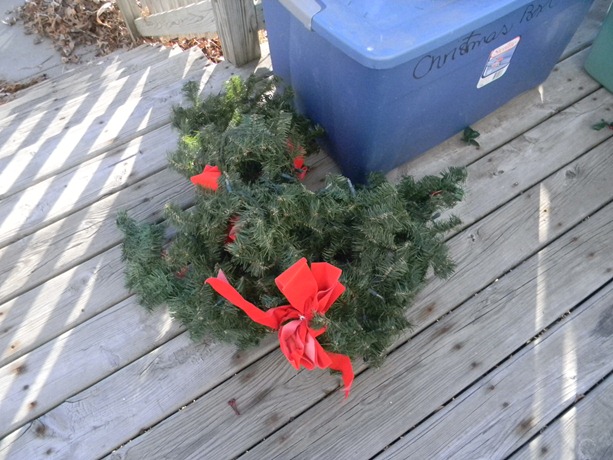
Then I found the tote with the greenery and took off the old and faded bows.

DSCN1761

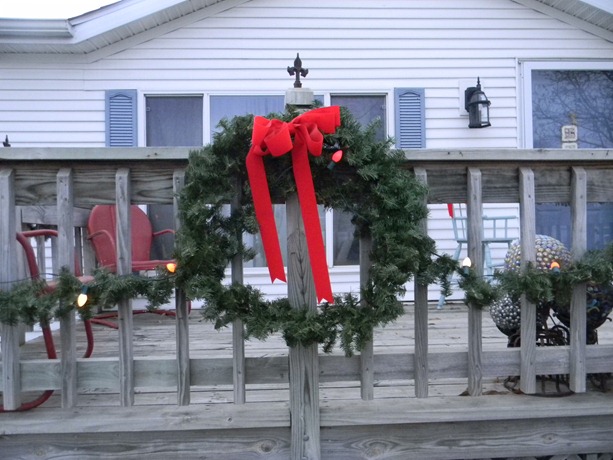
In no time there was a nice, big, albeit fake, wreath for the front deck.

DSCN1773

Not one dime spent after I discovered a spool of ribbon in the Christmas decorations and made a fresh new bow instead of spending $5 for one at the store.

DSCN1774

This was the beginning of holiday decorating at my house, done on a 60° late-November afternoon. Just in time to welcome the snow coming this weekend – then it will look a lot like Christmas for sure!

Thursday, November 24, 2011

A Life of Thanks

Well, I’m not sure how we got to the end of November already, but we’re here. The day we give thanks for our abundant blessings and then feast in gratitude!


Our Thanksgiving celebration this year is a bit different than we’ve been used to. It will be a quiet dinner here with Greg’s parents. I’ve been telling people “we’re empty-nesting” this year: Brad’s gone for visitation, Nick has to work, Jess, Scott, and Silas are going to Missouri. We’ll gather on Saturday with the rest of Greg’s family and celebrate together.

DSCN1736

I may not have my kids and grands with me today, but to be honest, every day is one of Thanksgiving. Every day I’m thankful that I have my kids close to me and that I get to be a hands-on grandmother, the way I always imagined. Every day I’m thankful for the blessing of a long and happy marriage to a man who has made me a better person. Every day I’m thankful that we have a home and food on the table, we have clothes, and the ability to heat and cool our home. We don’t have a multitude of material things, but we have what we need.

So while today we feast in honor of the abundance in our lives, we say thanks daily for the blessings. There is a quote going around the world-wide-web that I’d like to share:

“What if you woke up today with only the things you gave thanks for yesterday?”

Be thankful today for your joys, your sorrows, and the challenges of life. Be thankful for them every day.

Happy Thanksgiving!

signature

Monday, October 10, 2011

The Boy with the Tail…

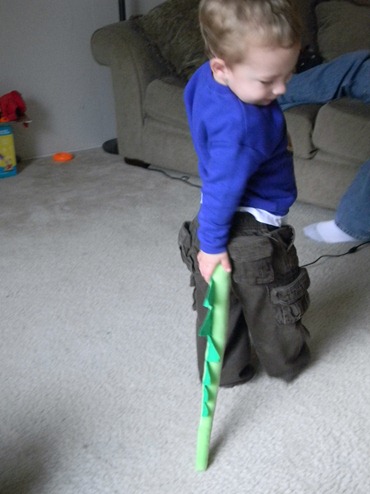
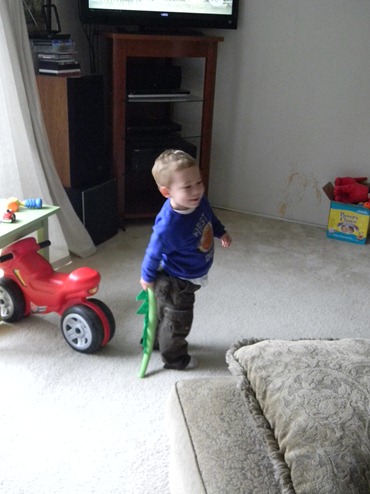
Everyone who knows Bradley or has read this blog, knows how much he enjoys dinosaurs. He’s recently realized that they have tails, as do the stuffed toy puppies and the real kitties, but alas, he does not. We made him a yarn tail one day, just taping it to the back of his pants. He showed the kitties and walked around with it for awhile. It was okay, but didn’t last long.

This morning I was searching the local “buy everything here” store for Halloween Peeps, when I came across an endcap full of masks and tails. No way! The dinosaur mask was ugly, but the tail, it was perfect. It has a little clip at the top to attach to his pants, yet will pull off easily if it gets caught in something (safety first!).

Bradley was here for a short while this evening, and found the tail on the counter almost immediately. He was so excited! I clipped it on and he walked around the room, watching the tail drag behind him.

DSCN1500 

DSCN1499 

It’s just the simplest of things that delight a child. They don’t need to have lots of money spent on them to have fun. This tail was a couple of dollars – but I’ll be copying it to make a few more in different colors, so he can share when playing with a friend, and he can have one at home and one here.

I think I have just as much fun watching his enjoyment!

signature

Monday, September 05, 2011

Making Some Fun

make_do_and_mend Today’s Make Do & Mend project is one from the garage. Well, kinda sorta. I’ve asked Greg to keep any large pieces of cardboard we can, and we have a small collection of big cardboard. Greg isn’t excited about keeping it, but he humors me. (I’m a lucky girl and I know it!)

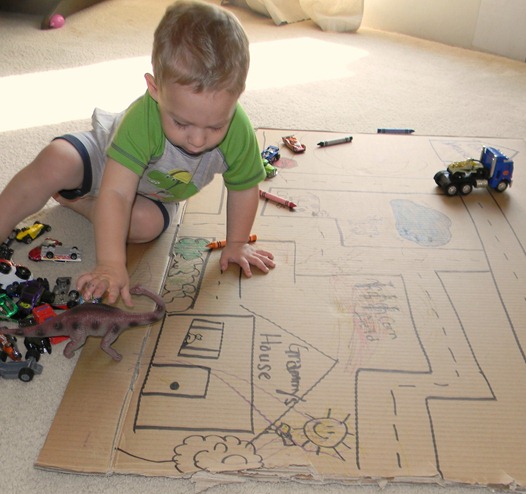
Friday of last week was the first time for me to keep both grandboys here all day. I knew I’d need to keep Bradley busy while I tended to the baby, so before leaving to pick them up, I dragged out one of the smaller pieces of cardboard and put it on the back porch. Bradley saw it right away when we came up on the porch, and was excited when I brought it inside.

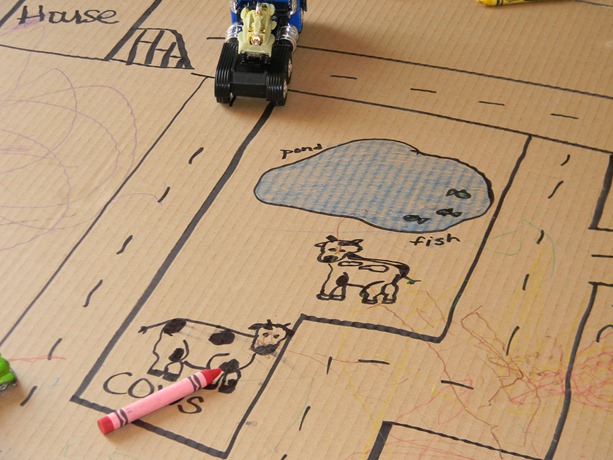
I drew a quick “map” using a black marker, putting Brad’s house in one top corner, and my house in the opposite bottom corner, then a maze of roads in between. Then came the fun part – a stop sign, a corn field, cows (his request), a pond with fish, trees, shrubs, a bird, and one of my kitties sitting in the window.

DSCN1269

I labeled the drawings and Brad started coloring. I helped color a little bit, and I think we’ll be adding things and coloring them for awhile – sort of a continuous project.

Silas laid on the floor, contentedly watching the ceiling fan most of the time, but eventually did need some attention of his own, and some snuggling and rocking to sleep for a nap. To keep his big brother busy, I brought out the little cars and the box of dinosaurs. Brad thought it was great that he had roads to drive his cars, and his dinosaurs moved into my house immediately!

DSCN1272

This project cost no money and only a few moments of time, yet we made tons of fun out of it!


Tammy

Monday, August 08, 2011

Make Do & Mend Monday

It’s been a few weeks since I posted – things have been a tad busy, but no complaints. Silas is a sweet way to be busy!

Silas (10)

I know, I could look at him all day, too, but let’s move on to my “Make Do & Mend” project.

A few years ago I made my own shopping bags and they’ve been really useful for lots of things. Mostly they keep from having to bring home a bazillion of those nasty plastic bags when I buy groceries. (Those bags multiply in the night, you know.) There used to be a big plastic bag filled (stuffed) with plastic bags hanging from a hook in the laundry room. Then there was a big paper canister from dishwasher tabs stuffed with more bags – that was tucked into a bottom cabinet. Then there was my Noah’s ark cookie jar stuffed with still more… plus the assorted few tossed on the counter waiting to be stuffed somewhere. Like I said, the cloth bags took care of bringing so many of the others in the house.

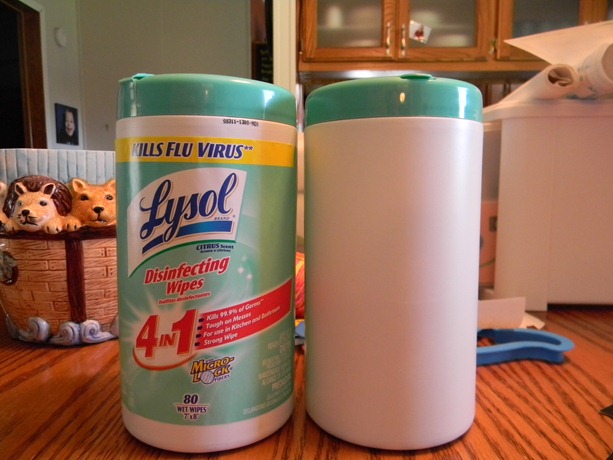
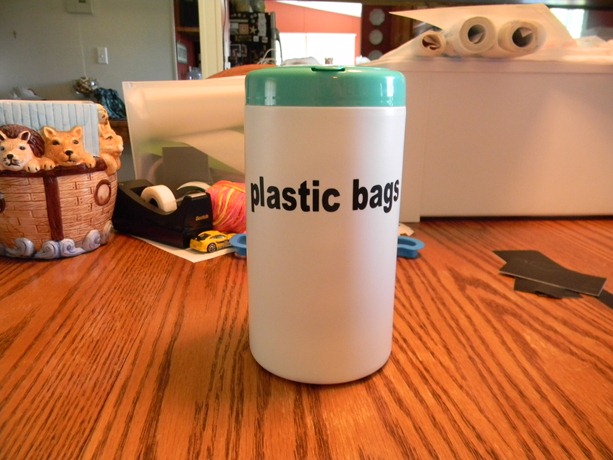
I still need a few of them, though, since I use them to clean out the litter box, for small trash bags, and for loading up with giveaway stuff for donation or to take wherever it needs to go. So once in awhile I leave the cloth bags in the car and take the plastic, and while I don’t have near the volume of plastic bags hanging around that I used to, storing them is still an issue. Well, it was an issue – until today. The other night I found this on Pinterest – using an empty wipes container to store plastic bags, and they’re folded in such a way that as you pull one out, the handle to the next pops up. Genius!

I had a Lysol wipes container that I’d just emptied over the weekend. It’s a little larger than what was used in the inspiration link, but I have plenty of bags to fill it up!

DSCN1044

(See the ark back there? It’ll be great to empty that jar and fill it with COOKIES!)

I won’t rewrite the directions here – please visit the link to see how it’s done. I also didn’t decorate my container – it’s just going under the bathroom sink in the cabinet. I did, however, label the container so anyone who may need to replace the bag in the trash in there will know where to get one.

DSCN1047 

A little vinyl and the Cricut make lovely labels for almost everything! Obviously I just peeled off the paper label and rubbed on the vinyl one.

It is filled up with bags and snugly at home under that bathroom sink. The other one will be filled to go in the master bath as soon as the wipes are used up. You have to know that now I’ll choose my wipes by container size, because I need one of these in the garage, one in the car, and one by the litter box. No more bags of bags hanging around – yea!

make_do_and_mend

My good friend Heidi is the creator of Make Do & Mend – check out her awesome projects and then visit more of my friends who are listed on the sidebar of her blog. They always have creative and inspirational MD&M’s.


Tammy

Tuesday, August 02, 2011

Introducing the New Grandboy…

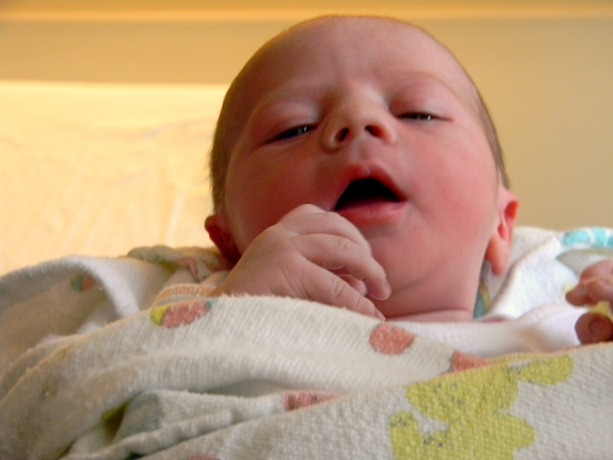
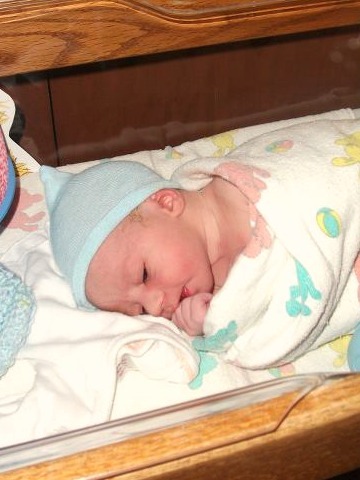
You know when the phone rings at 10:15 on a Saturday night that something is afoot. It was Jessica calling to let us know that she was on her way to the hospital in Lincoln. Contractions were 3 minutes apart, and had been going on like that for two hours. She’d had so much “false” labor over the past several weeks that she wasn’t counting on staying at the hospital, but stay she did, and at 3:26 Sunday morning she gave birth to the sweetest little boy!

His name is Silas Paul Robinson and he’s so cute we could just eat him up! Everyone thought Jess would have at least an 8-pounder this time, but he was a lean 6 lb., 13 oz., and 19 3/4” long.

Silas bassinette

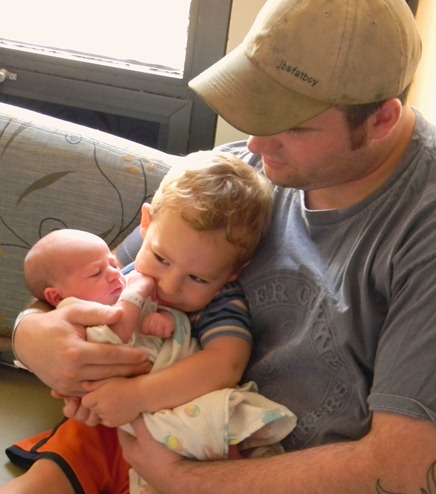
Mama and Daddy are both very happy -

Silas with Mama and Daddy

and his big brother Bradley just adores him!

DSCN1031

Of course the rest of us, do, too, and we can’t wait to get to know the little guy!


Grammy Tammy

Monday, July 04, 2011

Make Do & Mend Monday

This Make Do & Mend project turned out not quite the way it was intended when I finally started it, but I like it very much.

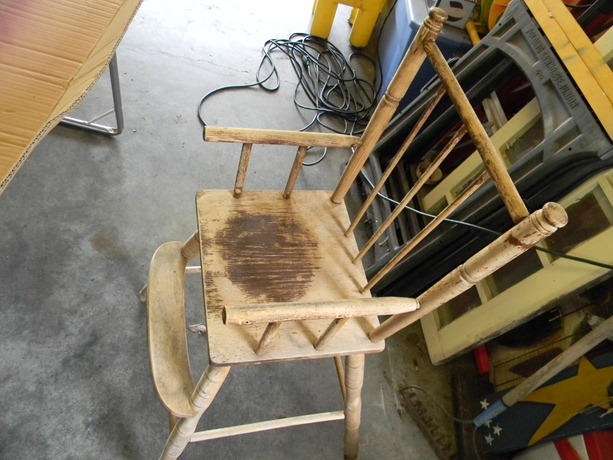
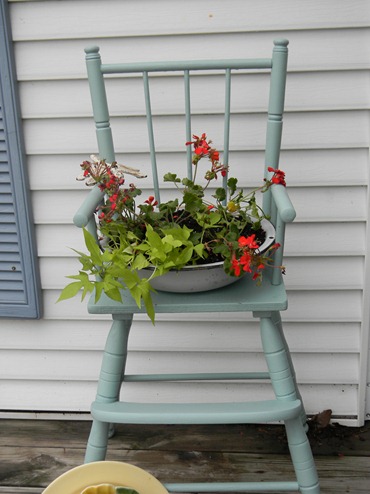
It all began out with this old high chair that I picked up at a garage sale three or four summers ago. I thought I would cut a hole in the seat for a flowerpot, and put the chair out in the garden. It was wobbly and dirty, so I put it in the garage until I took the time to deal with it.

highchair

So, that was a few years ago. That much time in my garage did it no favors as it got wobblier and dirtier. In the Spring I asked Greg if he’d power wash it to get the grime off. I was thinking I would glue it back together, paint it, and bring it inside to use for a certain little boy to use at the kitchen counter.

Power washing did the trick of getting off all the grime and the finish, but it also pretty much shredded the wood in many places. I sanded some, but the more I sanded, the more wobbly joints and disconnected places I found. The chair was rough and still kind of wobbly, and it became clear that it would be safer for my grandkids if the chair stayed outside and housed a flower pot instead.

A few coats of paint later, and here it is:

highchair after (2)

For now it is sitting on the porch by the front door. I like it there, but am not sure that’s where it will stay. The flowers are planted in an old enamel bowl that just barely fits the seat. They’ll fill out in the next couple of weeks and look a bit more lush. I’m afraid I tested their limits in the tiny pots from the store before I planted them, but they’re bouncing back nicely.

highchair after (5)

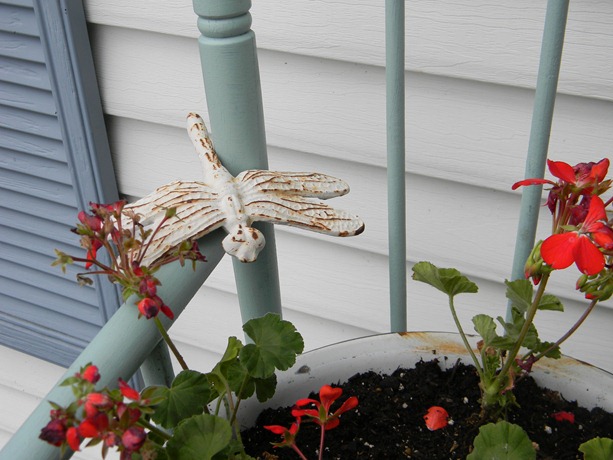
This sweet iron dragonfly is keeping watch. He’s heavy enough, he just sits on the arm of the chair without having to be fastened. I’d like to add a little something across the back of the chair, but haven’t quite figured that out yet. Something I can change with the seasons. I’ll let you know.

make_do_and_mend


As always, if you want to see a few more Make Do & Mend projects, you can click this link or the button to go to Heidi’s blog where she has a list of participants on the right-hand side of her posts.

If you post a Make Do & Mend project, we’d all love to see it – leave me a link in your comment.


Have a safe and happy 4th of July!


Tammy

Tuesday, June 28, 2011

Dinosaur!

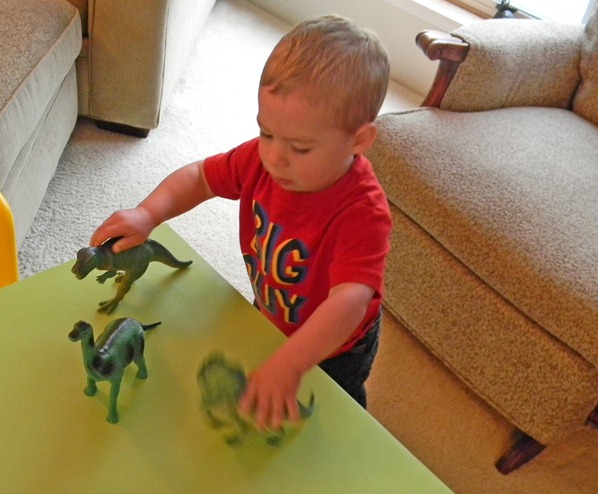
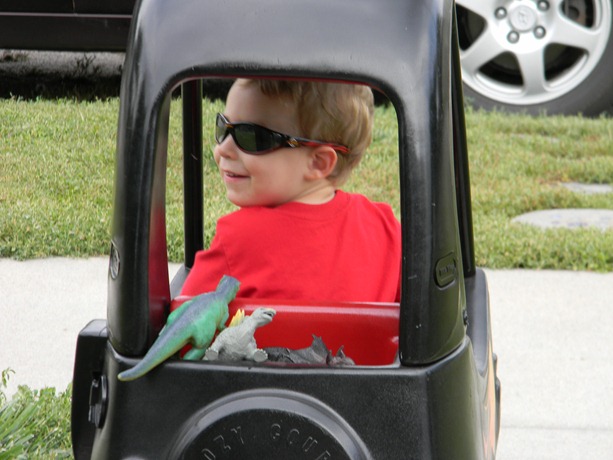
I realize that many of my posts about Bradley playing are of activities I’ve set up for him. He loves those, and I enjoy doing them, but this Grammy has other things she needs to tend to around the house, too, so the little man gets to play by himself plenty. His most favorite toys are the dinosaurs.

They’re just rubber/plastic/whatever, and are only $1 each at the local store. He has six now and loves each one. We know the names of most, but don’t worry about the ones we don’t know. They’re all just “dinosaur” anyway right now.

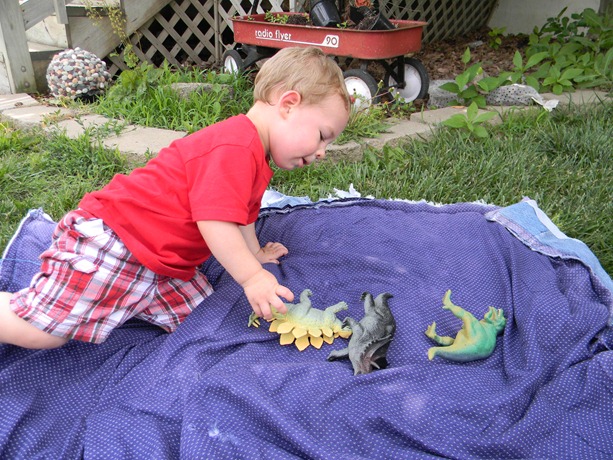
They stomp around and growl at us and each other. Sometimes they fight with each other, sometimes they kiss each other. Sometimes I have to kiss them. Recently, they began eating grass when they were playing outside.

DSCN0848

They had been on a long ride in the hot rod and needed a rest and snack, I guess.

DSCN0831

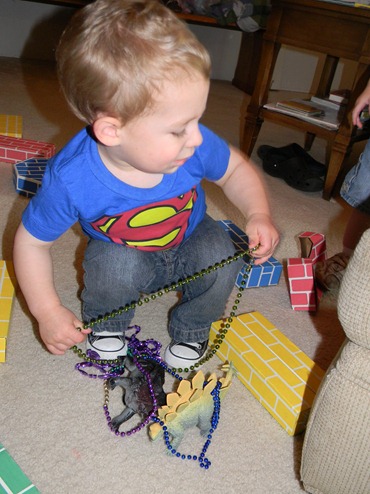
Most usually they’re in a natural state, as God intended, but while the girl cousins were here, the dinos were adorned in beads.

DSCN0792

Sometimes one or two will go home with Bradley and spend the night, but they always come back and the house is filled with stomping and growling again. Growling – all.day.long. But that’s okay, because…

Rawr

Monday, June 27, 2011

Make Do & Mend Monday

make_do_and_mend When it comes to my crafty projects, many times I’m a copycat. I see an idea, like it, and reproduce it for myself or as a gift. Sometimes I tweak it a little to suit my tastes or be able to use the supplies available. This is one of those projects. Yes, this post got long – I do eventually show you my Make Do and Mend project. When you get done reading here, please go visit my friend Heidi at Cranberry Chronicle and take a look at what she and my other internet friends are repairing, repurposing, or redecorating in order to use what we have to make our homes comfortable and beautiful.

Several years ago a coworker mentioned that in that month’s issue of Martha Stewart living, they had suggested that if you have your liquid dish soap on the counter or by the sink, it would be prettier to put it in a glass bottle or jar. I wasn’t much into Martha at the time, but I liked this idea and found a little bottle with a pump dispenser at Goodwill just for this purpose. I forgot to get a “before” photo, so had to search my picture files to see if I’d captured said bottle in the midst of other fun times. This is the best one I found.
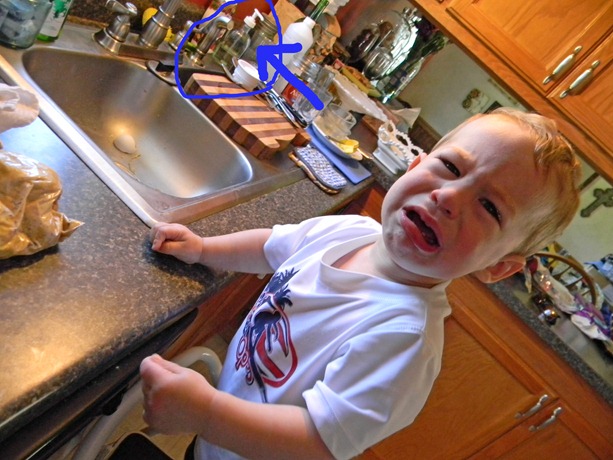
(Yes, the boy was having a fit. We were making chocolate chip cookies together and he wanted to eat more chips. I put them in the dough. He’d already had several. That’s the kind of mean Grammy I am. His mommy snapped this photo of his sad face.) Anyway, look past him at the blue arrow and circle and you’ll see the bottle that has held my liquid dish soap for several years. I think it was a lotion bottle originally. It works great, though, a quick squirt or two and we have sudsy bubbles for washing hands, cast iron skillets (yes, I use soap – the pans are FINE), and all other kitchen tools that won’t fit into the dishwasher.

Speaking of the dishwasher, since it gets used daily, and digging around in the cupboard under the sink is a pain, I like to keep my “tabs” in an old canning jar on the counter. I’ve used this particular jar for a few years now. It came to me in a box of assorted old jars from my grandparents. I love the “farmhouse” feel of having it on the counter, and the usefulness of having the dishwasher soap readily available.
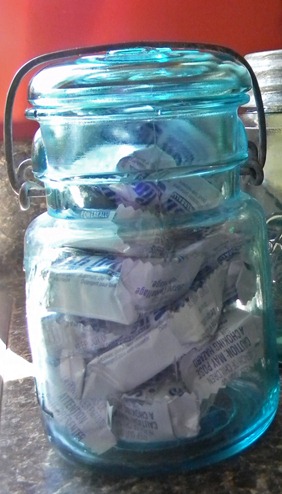
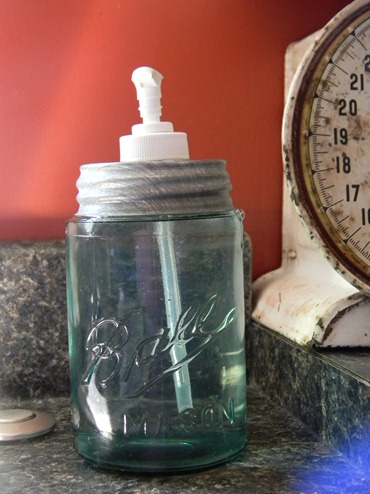
So, several months ago as I perused some homemaking and decorating blogs I came across a few people who were using the old canning jars with zinc lids for their liquid soap. Of course I loved that look much more than the jar I was using. I do have a jar with a zinc lid, but it’s one from my grandparents and I didn’t want to essentially destroy the lid of that one, so when I was thrift shopping I kept an eye out for one I wouldn’t care about drilling a hole into. It was found a couple of months ago at the antique mall in Lincoln for $1. The jar was dirty and had something sticky all over it that took a little elbow grease to remove, but it came clean eventually.
DSCN0859

The other day I go the hole drilled in the lid and used the pump apparatus from my original bottle to make my new dish soap dispenser jar. It’s also blue glass, like the one for the dishwasher tabs. Here they are together. In reality, one sits on one side of the sink, one on the other.
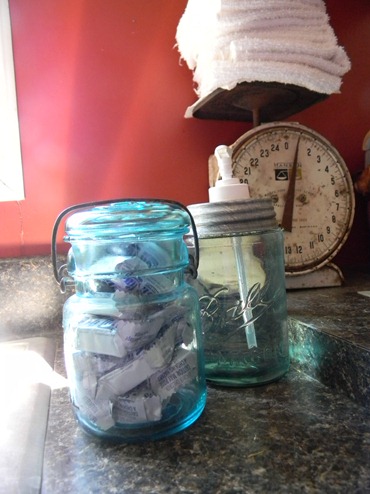
DSCN0863 

I must say, I really like it. I love the rustic, old look, even with the white plastic pump. I did use GE Silicone II to seal around the hole in the lid, but if I ever find a pump I like better, it won’t be difficult to change it out. No real tutorial to show – you have to break the ceramic piece on the inside of the lid and discard it, measure your pump apparatus so you know what size hole to drill, then drill it. Insert the pump, seal it up and wait 24 hours for the caulk to dry. If you Google “mason jar soap dispenser tutorial” you’ll come up with many places to see the process step-by-step.

Oh, what’s that scrappy looking scale behind the jars, you ask? It’s a garage sale find from last year that I finally got cleaned up (yep, that’s clean) and brought inside. For now I stack the washcloths on it that we use for Bradley after he eats. Again, that rustic old farmhouse look I’m liking.

Okay, this post is finally finished - go now and make over something at your house!

Saturday, June 25, 2011

Frog or Toad?

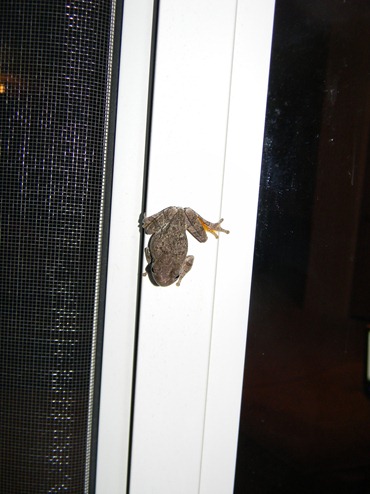
It was just about dark last night, Greg was reading something on his Kindle, I was surfing blogs and Pinterest, the cats were snoozing at my feet. For some reason Greg looked up at the big window and saw a tiny toad. Not on the deck, but on the glass. Up high on the window.

By the time I got unwound from laptop and kittie-boys and got out the front door, it had moved off the glass onto the window frame.

DSCN0889

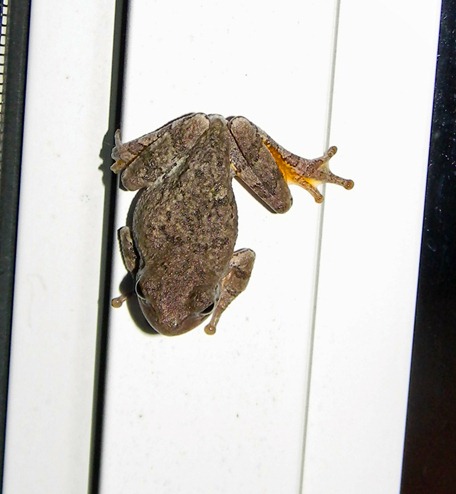
It was just about 1½” long and at first had it’s hands and feet splayed so you could all of his little toes.

By the time Greg got me my camera, it had moved, protecting itself, making himself smaller. One of the cats had come outside with me, and while he didn’t notice this sweet little guy, this sweet little guy had noticed us.

So I’ve been calling this a toad, but after looking at a few quick web pages for some specific info, I’m not sure if this is a toad or a frog… I’m leaning more towards frog.

I love that we can see the little balls on the ends of his toes. (One time I got to see a toad whip out it’s tongue and grab a fly off a garden hose. It was pretty cool.)

Did you know that toads have poison glands behind their eyes? I’ve been picking them up and holding them since I was a little girl and I never knew that.

Anyway, when I took the camera back inside, the cat came in with me, then turned around and wanted to go right back out. In fact, both cats wanted out. I made sure this little guy was gone – he was – before I released the great feline hunters.

Hopefully the frog/toad went to eat bugs.

So let me know if you know – frog or toad?

Tuesday, June 21, 2011

Make Do and Mend

make_do_and_mend I got so excited to show Brad’s new hot rod Little Tykes car yesterday that I forgot about Make Do and Mend Monday. My contribution is a tad lame this week, but it’s something that makes a noticeable difference and I appreciate it.


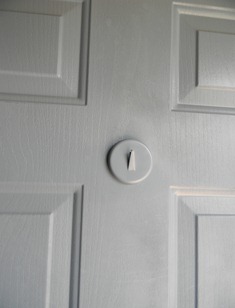
We have steel doors, so no nails for hanging a wreath or sign or other fun stuff on the front door. Instead, I purDSCN0826chased some really strong magnets many years ago that each have a hook on them. Lots of times you can find them in the holiday aisles with the garlands and such in December. That’s where I found mine, so they were coated in a Christmas green-colored plastic. This Christmas green stood out like a sore thumb on the door, so everything I hung on them had to be large enough to cover up the magnet. I don’t know why it took me so long, but a couple of weeks ago I peeled the plastic off the magnets and painted them the same color as the doors. I love that they blend right into the door!


Next up, something pretty to hang on that hook…


Please join Heidi and a few of my other online friends and see what other Make Do and Mend Monday projects they've accomplished. They're really inspiring!

Monday, June 20, 2011

Hot Roddin’

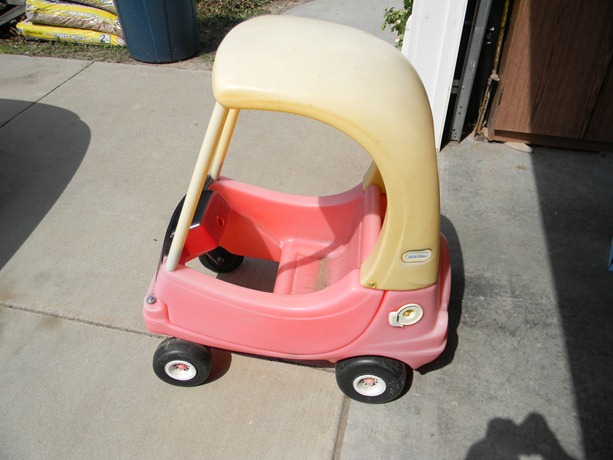
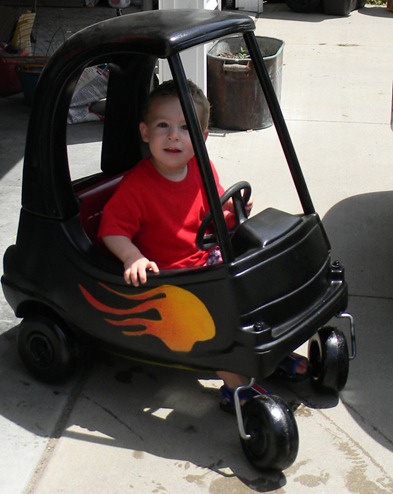
A few weeks ago, when I first became a member at Pinterest, one of my first pins was a photo of a “pimped out” Little Tykes car. It was just a couple of days later that Greg and I were making the Saturday morning garage sale rounds and found an old Little Tykes car for $5. Jackpot!

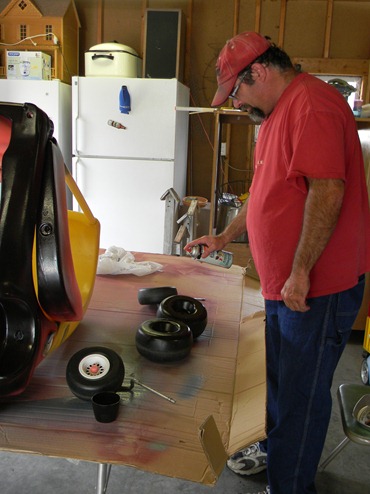
Greg had chuckled at my excitement over the little car, yet as soon as we got home, he broke out the spray paint. DSCN0729

Yes, you can see he painted the front before he even washed it. He was pretty excited about this project.

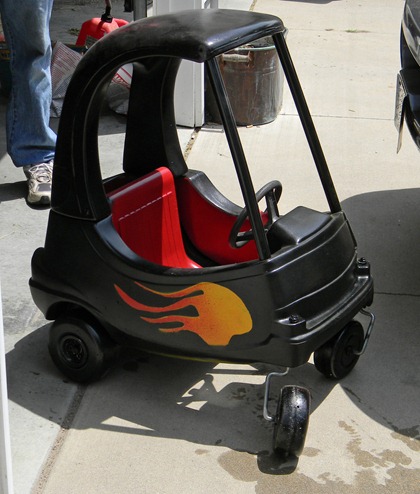
So I left the color choices to Greg, I just said I’d like to put flames on the sides. He chose a black exterior and cherry red interior.  We considered painting the wheels with a shiny metallic silver spraypaint, but a couple of the inserts were cracked and broke when the wheels were disassembled for cleaning and painting. So the entirety of each was just sprayed black.

DSCN0754 

Nick came over one afternoon and drew the flame stencil, but there was not photography of that process allowed. He sprayed the driver’s side door, showing me how to shade the yellow, orange, and red paints. This morning I was able to get back out there and paint the flames on the other side.

Doesn’t that look spiffy? Jess likes it so much she’s asked if we want to overhaul the fairly new Little Tykes car that Brad has at their house. We’ll wait and see how the paint job fares on this one. It’s already scratched where the door opens and closes.

I do know that if we find another old one, we’ll bring it home – Greg wants to do a cherry red exterior and black interior version. I wonder if some pinstriping would be warranted on that one. (We did find another car at a garage sale a week ago, and Jess and I joked about running down the street to get it, but it had a sold sign on it already.)

We gave the car to Brad this afternoon and he couldn’t wait to get into it!

Paint details: black and cherry red Rustoleum for plastic. Flames were painted with regular Rustoleum spray paint. Flame stencil was hand drawn after consulting photos online.

I want to put a skull and crossbones on the back end, and now that I look at the photo, I’m thinking we need to add some headlights to the front. I guess our projects are never really all the way done…

Saturday, June 18, 2011

Loss

This evening another huge hole has been torn in the fabric of my family. We mourn the loss of my eldest cousin, Barbara Allen Moore, who passed away from leukemia after a brave fight.

47358_1509657974047_1012271586_31466966_1848587_n

Barbie (and only our family called her that) was very close to my mom, who I think considered her to be more of a younger sister than a niece.  Barbie was at our house a lot as a young bride, seeking advice from Mom or doing little make-overs on us with her Avon.

I babysat her kids, then when they were almost grown up, she babysat mine. As adults, she and I became good friends. Our interests and hobbies were the same and we could talk for hours upon hours about gardens and birds and needlework and cooking. She sang in my wedding, too.

She was direct and to-the-point most of the time, calling a spade and spade and moving on with her life. Here’s what she had to say about herself in her Blogger profile:

“About Me: I am a mother, grandmother, artist, cook, baker, tomboy, feminist, writer, reader, shoe junkie and teacher. Life has often been very hard but I can't seem to lose my optimism or cancel my dreams or give up on humankind. It's just not in me to say stop when it's so much more fun to say go, go, go faster! Live life like you mean it!”

And this is what she wrote in her Facebook profile:

“I went on "my travels" a few years ago. Me, my old truck and Carlos Santana. We drove thru 12 states, talked to a lot of people, got lost, got found, saw lots of stuff. What I mostly remember was the women who were astonished that I would be driving around the country all alone. "What if you get a flat tire? What if your truck breaks down? What if you get lost?" were the most common questions. "I could never do that." was the most common reply. I had spent my entire life raising children, first my siblings then my own and it was time to take a break and just be alone with me. I had a great time! There was the old Navajo on Rt. 66 who had worked the railroad in North Platte the same time as Grandpa Bob, the giggly girls in California, the gas station attendants in Oregon who laughed at my astonishment over them pumping my gas, checking the tires and fluids etc. When I voiced my surprise they said "You’re in Oregon now ma’am, we do things different here". Camping by the ocean in Washington after assuring everyone that Nebraska did exist and no we didn't have an ocean. Seeing the aquaduct system and fruit tree groves in California. No, I won't spend time in Wyoming again. Stayed in the mountains in Colorado w/ my brother and enjoyed the museums of Santa Fe. Now, at this time in my life when the challenge is to just get up everyday, ignore my dread disease, and live, I remember that trip and how much fun I had. How it opened up the wanderlust in me, how the call of the ocean still rings in my ears. I have a list now of places to go and see and a plan to do it. So in the long scheme of my life I've learned that now is the most important thing and what I learn is the next. Cooking, sewing, painting, gardening fill my days and I am somewhat content.”

I was fortunate to spend an afternoon with Barbie recently. She was in the hospital and on the mend after being very ill. I noticed how much she looked like Grandma Adams. I’d not seen that in her before, and it brought me comfort. We had a wonderful visit - I made her laugh, and she made me cry. It was all good.

I hope she and Debbie and my mom and Grandma are sitting around the table with glasses of iced tea, laughing and chatting and solving the problems of the day. She will be sorely missed down here.