Click Here For Free Blog Backgrounds!!!
Blogaholic Designs

Tuesday, June 28, 2011

Dinosaur!

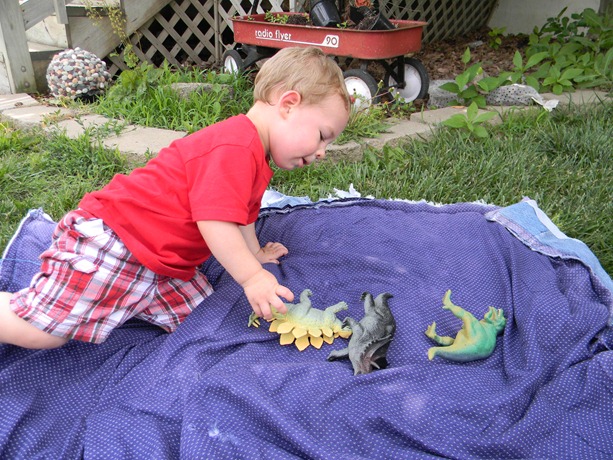
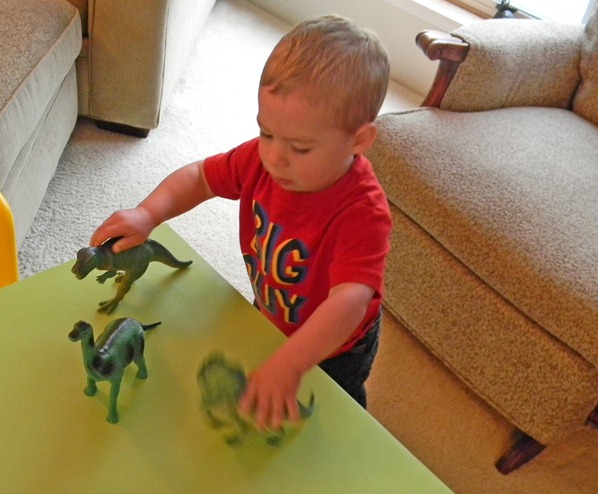
I realize that many of my posts about Bradley playing are of activities I’ve set up for him. He loves those, and I enjoy doing them, but this Grammy has other things she needs to tend to around the house, too, so the little man gets to play by himself plenty. His most favorite toys are the dinosaurs.

They’re just rubber/plastic/whatever, and are only $1 each at the local store. He has six now and loves each one. We know the names of most, but don’t worry about the ones we don’t know. They’re all just “dinosaur” anyway right now.

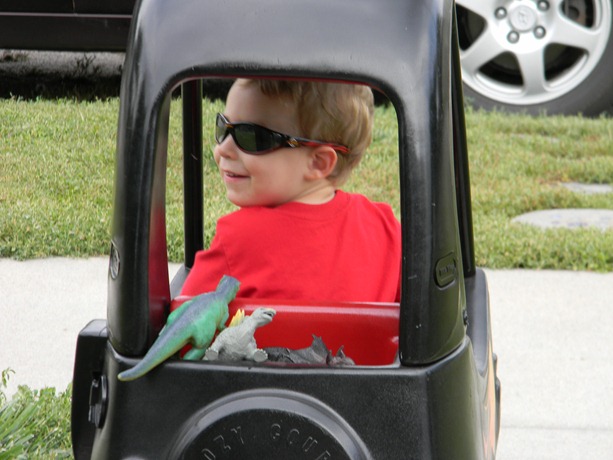
They stomp around and growl at us and each other. Sometimes they fight with each other, sometimes they kiss each other. Sometimes I have to kiss them. Recently, they began eating grass when they were playing outside.

DSCN0848

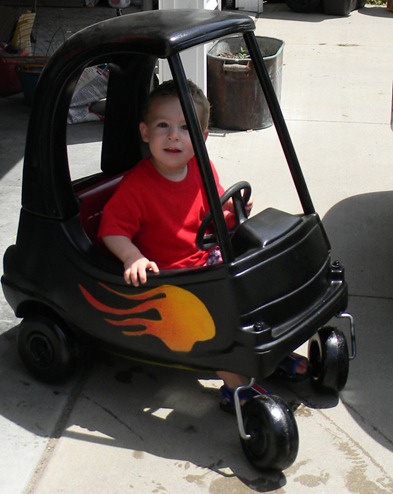
They had been on a long ride in the hot rod and needed a rest and snack, I guess.

DSCN0831

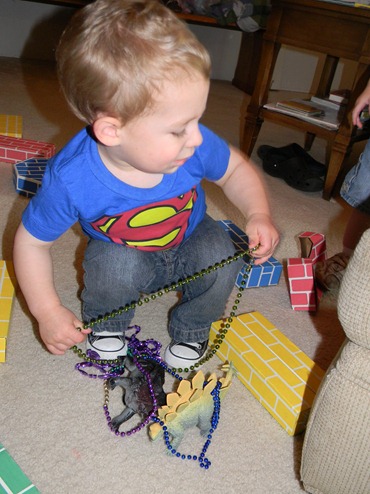
Most usually they’re in a natural state, as God intended, but while the girl cousins were here, the dinos were adorned in beads.

DSCN0792

Sometimes one or two will go home with Bradley and spend the night, but they always come back and the house is filled with stomping and growling again. Growling – all.day.long. But that’s okay, because…

Rawr

Monday, June 27, 2011

Make Do & Mend Monday

make_do_and_mend When it comes to my crafty projects, many times I’m a copycat. I see an idea, like it, and reproduce it for myself or as a gift. Sometimes I tweak it a little to suit my tastes or be able to use the supplies available. This is one of those projects. Yes, this post got long – I do eventually show you my Make Do and Mend project. When you get done reading here, please go visit my friend Heidi at Cranberry Chronicle and take a look at what she and my other internet friends are repairing, repurposing, or redecorating in order to use what we have to make our homes comfortable and beautiful.

Several years ago a coworker mentioned that in that month’s issue of Martha Stewart living, they had suggested that if you have your liquid dish soap on the counter or by the sink, it would be prettier to put it in a glass bottle or jar. I wasn’t much into Martha at the time, but I liked this idea and found a little bottle with a pump dispenser at Goodwill just for this purpose. I forgot to get a “before” photo, so had to search my picture files to see if I’d captured said bottle in the midst of other fun times. This is the best one I found.
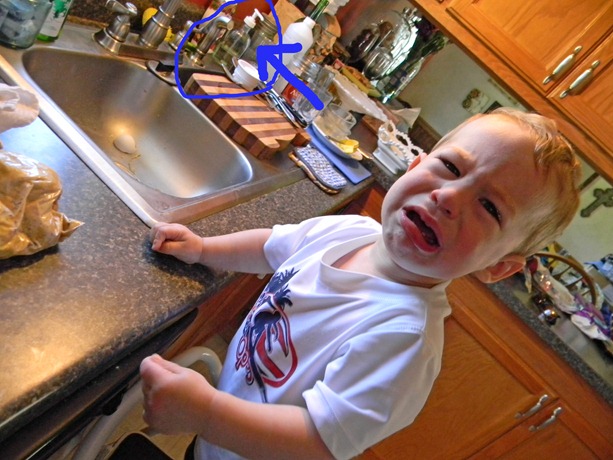
(Yes, the boy was having a fit. We were making chocolate chip cookies together and he wanted to eat more chips. I put them in the dough. He’d already had several. That’s the kind of mean Grammy I am. His mommy snapped this photo of his sad face.) Anyway, look past him at the blue arrow and circle and you’ll see the bottle that has held my liquid dish soap for several years. I think it was a lotion bottle originally. It works great, though, a quick squirt or two and we have sudsy bubbles for washing hands, cast iron skillets (yes, I use soap – the pans are FINE), and all other kitchen tools that won’t fit into the dishwasher.

Speaking of the dishwasher, since it gets used daily, and digging around in the cupboard under the sink is a pain, I like to keep my “tabs” in an old canning jar on the counter. I’ve used this particular jar for a few years now. It came to me in a box of assorted old jars from my grandparents. I love the “farmhouse” feel of having it on the counter, and the usefulness of having the dishwasher soap readily available.
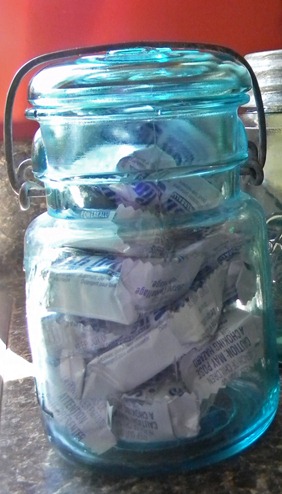
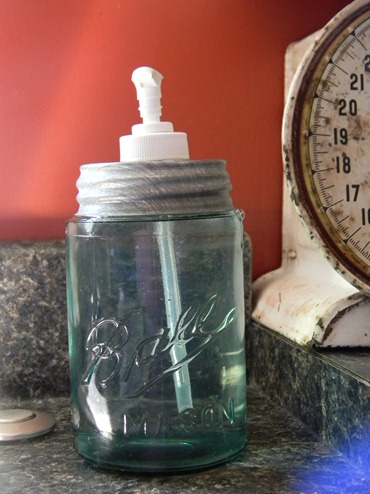
So, several months ago as I perused some homemaking and decorating blogs I came across a few people who were using the old canning jars with zinc lids for their liquid soap. Of course I loved that look much more than the jar I was using. I do have a jar with a zinc lid, but it’s one from my grandparents and I didn’t want to essentially destroy the lid of that one, so when I was thrift shopping I kept an eye out for one I wouldn’t care about drilling a hole into. It was found a couple of months ago at the antique mall in Lincoln for $1. The jar was dirty and had something sticky all over it that took a little elbow grease to remove, but it came clean eventually.
DSCN0859

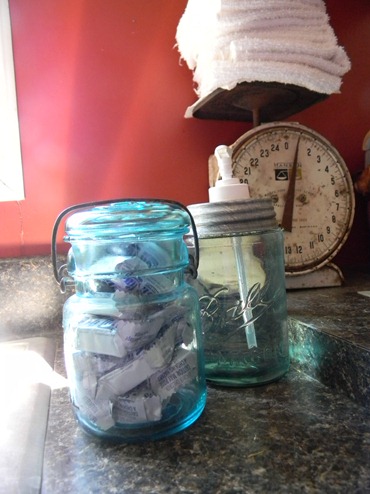
The other day I go the hole drilled in the lid and used the pump apparatus from my original bottle to make my new dish soap dispenser jar. It’s also blue glass, like the one for the dishwasher tabs. Here they are together. In reality, one sits on one side of the sink, one on the other.
DSCN0863 

I must say, I really like it. I love the rustic, old look, even with the white plastic pump. I did use GE Silicone II to seal around the hole in the lid, but if I ever find a pump I like better, it won’t be difficult to change it out. No real tutorial to show – you have to break the ceramic piece on the inside of the lid and discard it, measure your pump apparatus so you know what size hole to drill, then drill it. Insert the pump, seal it up and wait 24 hours for the caulk to dry. If you Google “mason jar soap dispenser tutorial” you’ll come up with many places to see the process step-by-step.

Oh, what’s that scrappy looking scale behind the jars, you ask? It’s a garage sale find from last year that I finally got cleaned up (yep, that’s clean) and brought inside. For now I stack the washcloths on it that we use for Bradley after he eats. Again, that rustic old farmhouse look I’m liking.

Okay, this post is finally finished - go now and make over something at your house!
Saturday, June 25, 2011

Frog or Toad?

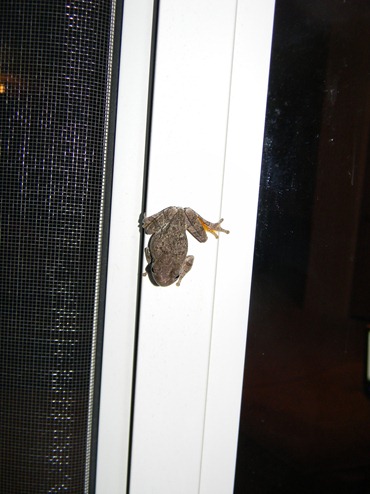
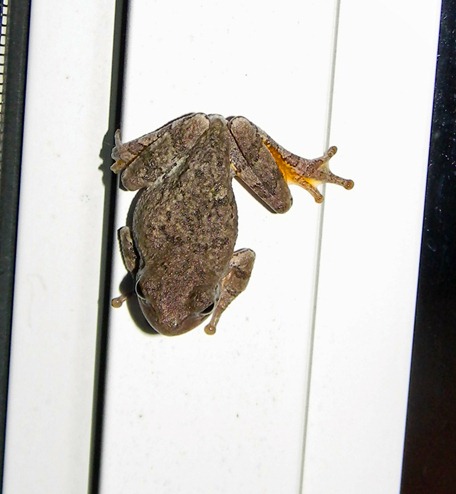
It was just about dark last night, Greg was reading something on his Kindle, I was surfing blogs and Pinterest, the cats were snoozing at my feet. For some reason Greg looked up at the big window and saw a tiny toad. Not on the deck, but on the glass. Up high on the window.

By the time I got unwound from laptop and kittie-boys and got out the front door, it had moved off the glass onto the window frame.

DSCN0889

It was just about 1½” long and at first had it’s hands and feet splayed so you could all of his little toes.

By the time Greg got me my camera, it had moved, protecting itself, making himself smaller. One of the cats had come outside with me, and while he didn’t notice this sweet little guy, this sweet little guy had noticed us.

So I’ve been calling this a toad, but after looking at a few quick web pages for some specific info, I’m not sure if this is a toad or a frog… I’m leaning more towards frog.

I love that we can see the little balls on the ends of his toes. (One time I got to see a toad whip out it’s tongue and grab a fly off a garden hose. It was pretty cool.)

Did you know that toads have poison glands behind their eyes? I’ve been picking them up and holding them since I was a little girl and I never knew that.

Anyway, when I took the camera back inside, the cat came in with me, then turned around and wanted to go right back out. In fact, both cats wanted out. I made sure this little guy was gone – he was – before I released the great feline hunters.

Hopefully the frog/toad went to eat bugs.

So let me know if you know – frog or toad?

Tuesday, June 21, 2011

Make Do and Mend

make_do_and_mend I got so excited to show Brad’s new hot rod Little Tykes car yesterday that I forgot about Make Do and Mend Monday. My contribution is a tad lame this week, but it’s something that makes a noticeable difference and I appreciate it.


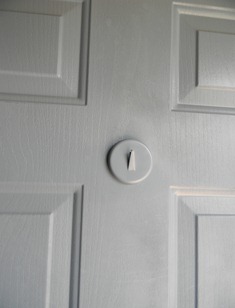
We have steel doors, so no nails for hanging a wreath or sign or other fun stuff on the front door. Instead, I purDSCN0826chased some really strong magnets many years ago that each have a hook on them. Lots of times you can find them in the holiday aisles with the garlands and such in December. That’s where I found mine, so they were coated in a Christmas green-colored plastic. This Christmas green stood out like a sore thumb on the door, so everything I hung on them had to be large enough to cover up the magnet. I don’t know why it took me so long, but a couple of weeks ago I peeled the plastic off the magnets and painted them the same color as the doors. I love that they blend right into the door!


Next up, something pretty to hang on that hook…


Please join Heidi and a few of my other online friends and see what other Make Do and Mend Monday projects they've accomplished. They're really inspiring!

Monday, June 20, 2011

Hot Roddin’

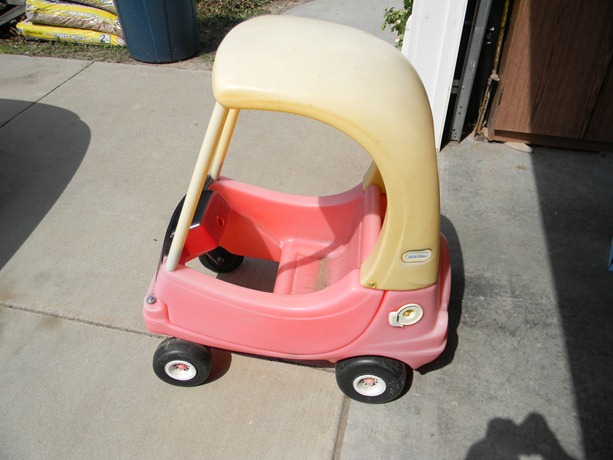
A few weeks ago, when I first became a member at Pinterest, one of my first pins was a photo of a “pimped out” Little Tykes car. It was just a couple of days later that Greg and I were making the Saturday morning garage sale rounds and found an old Little Tykes car for $5. Jackpot!

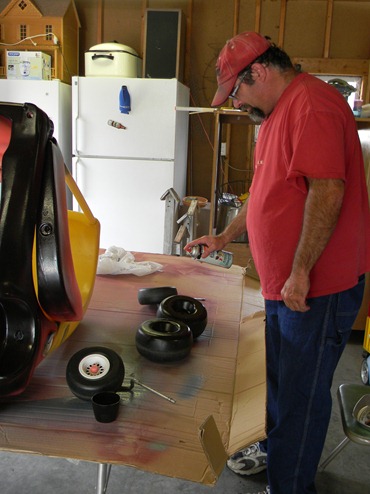
Greg had chuckled at my excitement over the little car, yet as soon as we got home, he broke out the spray paint. DSCN0729

Yes, you can see he painted the front before he even washed it. He was pretty excited about this project.

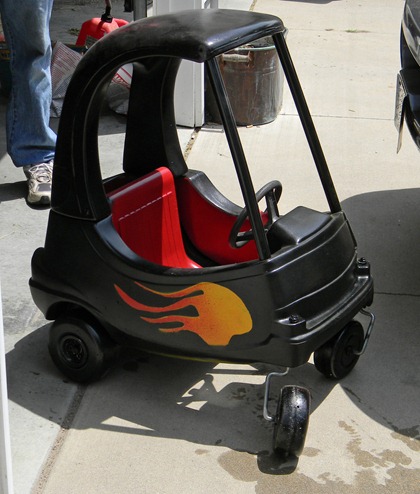
So I left the color choices to Greg, I just said I’d like to put flames on the sides. He chose a black exterior and cherry red interior.  We considered painting the wheels with a shiny metallic silver spraypaint, but a couple of the inserts were cracked and broke when the wheels were disassembled for cleaning and painting. So the entirety of each was just sprayed black.

DSCN0754 

Nick came over one afternoon and drew the flame stencil, but there was not photography of that process allowed. He sprayed the driver’s side door, showing me how to shade the yellow, orange, and red paints. This morning I was able to get back out there and paint the flames on the other side.

Doesn’t that look spiffy? Jess likes it so much she’s asked if we want to overhaul the fairly new Little Tykes car that Brad has at their house. We’ll wait and see how the paint job fares on this one. It’s already scratched where the door opens and closes.

I do know that if we find another old one, we’ll bring it home – Greg wants to do a cherry red exterior and black interior version. I wonder if some pinstriping would be warranted on that one. (We did find another car at a garage sale a week ago, and Jess and I joked about running down the street to get it, but it had a sold sign on it already.)

We gave the car to Brad this afternoon and he couldn’t wait to get into it!

Paint details: black and cherry red Rustoleum for plastic. Flames were painted with regular Rustoleum spray paint. Flame stencil was hand drawn after consulting photos online.

I want to put a skull and crossbones on the back end, and now that I look at the photo, I’m thinking we need to add some headlights to the front. I guess our projects are never really all the way done…

Saturday, June 18, 2011

Loss

This evening another huge hole has been torn in the fabric of my family. We mourn the loss of my eldest cousin, Barbara Allen Moore, who passed away from leukemia after a brave fight.

47358_1509657974047_1012271586_31466966_1848587_n

Barbie (and only our family called her that) was very close to my mom, who I think considered her to be more of a younger sister than a niece.  Barbie was at our house a lot as a young bride, seeking advice from Mom or doing little make-overs on us with her Avon.

I babysat her kids, then when they were almost grown up, she babysat mine. As adults, she and I became good friends. Our interests and hobbies were the same and we could talk for hours upon hours about gardens and birds and needlework and cooking. She sang in my wedding, too.

She was direct and to-the-point most of the time, calling a spade and spade and moving on with her life. Here’s what she had to say about herself in her Blogger profile:

“About Me: I am a mother, grandmother, artist, cook, baker, tomboy, feminist, writer, reader, shoe junkie and teacher. Life has often been very hard but I can't seem to lose my optimism or cancel my dreams or give up on humankind. It's just not in me to say stop when it's so much more fun to say go, go, go faster! Live life like you mean it!”

And this is what she wrote in her Facebook profile:

“I went on "my travels" a few years ago. Me, my old truck and Carlos Santana. We drove thru 12 states, talked to a lot of people, got lost, got found, saw lots of stuff. What I mostly remember was the women who were astonished that I would be driving around the country all alone. "What if you get a flat tire? What if your truck breaks down? What if you get lost?" were the most common questions. "I could never do that." was the most common reply. I had spent my entire life raising children, first my siblings then my own and it was time to take a break and just be alone with me. I had a great time! There was the old Navajo on Rt. 66 who had worked the railroad in North Platte the same time as Grandpa Bob, the giggly girls in California, the gas station attendants in Oregon who laughed at my astonishment over them pumping my gas, checking the tires and fluids etc. When I voiced my surprise they said "You’re in Oregon now ma’am, we do things different here". Camping by the ocean in Washington after assuring everyone that Nebraska did exist and no we didn't have an ocean. Seeing the aquaduct system and fruit tree groves in California. No, I won't spend time in Wyoming again. Stayed in the mountains in Colorado w/ my brother and enjoyed the museums of Santa Fe. Now, at this time in my life when the challenge is to just get up everyday, ignore my dread disease, and live, I remember that trip and how much fun I had. How it opened up the wanderlust in me, how the call of the ocean still rings in my ears. I have a list now of places to go and see and a plan to do it. So in the long scheme of my life I've learned that now is the most important thing and what I learn is the next. Cooking, sewing, painting, gardening fill my days and I am somewhat content.”

I was fortunate to spend an afternoon with Barbie recently. She was in the hospital and on the mend after being very ill. I noticed how much she looked like Grandma Adams. I’d not seen that in her before, and it brought me comfort. We had a wonderful visit - I made her laugh, and she made me cry. It was all good.

I hope she and Debbie and my mom and Grandma are sitting around the table with glasses of iced tea, laughing and chatting and solving the problems of the day. She will be sorely missed down here.


Friday, June 17, 2011

Fun In the Sun Toddler-Style

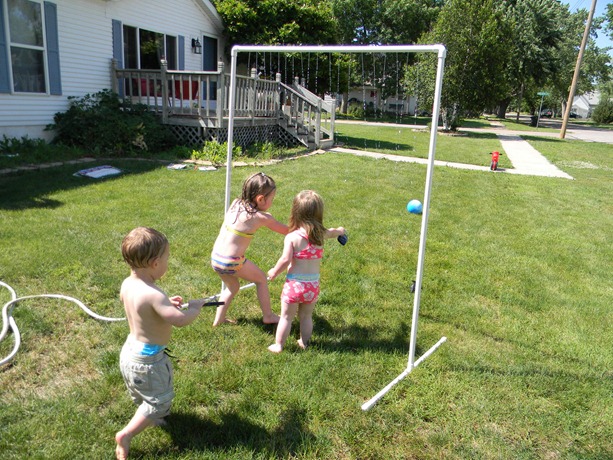
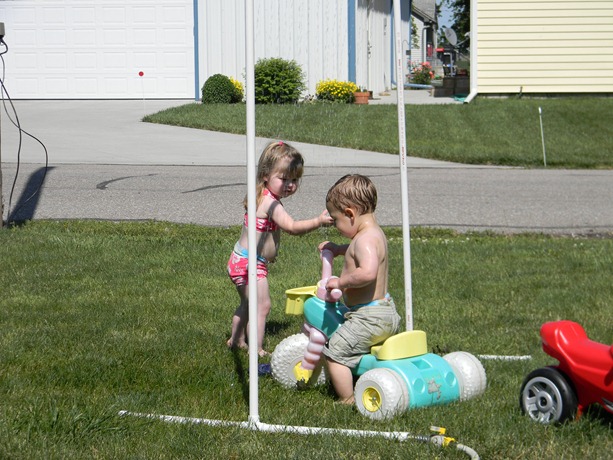
‘Twas a lovely, warm afternoon, with sunshine, light breeze, and low humidity. A perfect day to play outside in the water. The day began with a thunderstorm, though, so we didn’t set up the pool. Instead, we tried out the new “kidwash” sprinkler that Greg put together the other day.

DSCN0795

It’s just simple construction using ¾” PVC pipe, a couple of tees and a couple of 90° elbows. To connect the garden hose, we used a $6 connector with a valve so we can turn the water off at the hose. This means we can adjust the flow from a dribble to a hard jet, and so we don’t have to run around to the back yard and shut it off at the hydrant.

I’d seen this idea posted somewhere online last summer, and had bookmarked it, but I lost all of my saved blog inspiration, hundreds of recipes, and all of my “favorites” when my old laptop died last winter. I was happy to come across a photo of a kidwash on Pinterest, which led me to some easy instructions.

DSCN0809

Our sprinkler just has holes drilled instead of the mister jets installed, and is just dry-fitted. If possible, we’d rather not glue it so it can be disassembled for winter storage. There was one time today when one of the feet popped off the leg, but I was able to turn the water off using the valve, and pop it back together, then turn the water back on. Easy peasy.

The kids LOVED it! I have Alan’s girls here this week and it was the perfect time to try it out. Reese wasn’t so keen on getting under the water, but enjoyed playing in it without getting soaked. Taylor and Bradley, on the other hand, had a wet blast.

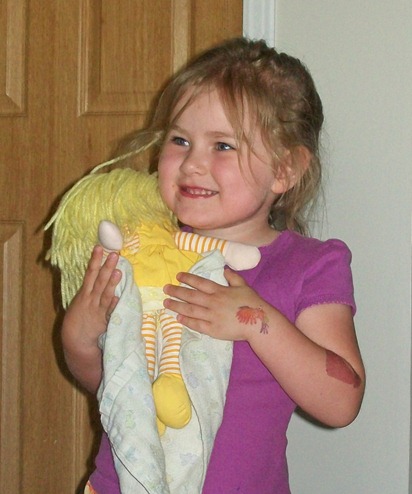
(Taking a little break from the fun – Taylor has tattoos on her legs and arms, courtesy of Grace. I mention that only because so many people have asked us “what happened to her knee?”.)

If you’re interested in building one of these for yourself and you have any questions about how we did ours, please email me. Greg said it took him all of 10 minutes to cut the pipe and assemble, and it only took that long because he had to heat up the fitting for the hose to soften it before screwing in the valve piece, because the threads didn’t match up. You may not have to worry about that.

Wednesday, June 15, 2011

Conversation from the Back Seat

100_3215mmm

Taylor (4 years old – in the back seat of the car as I’m driving): “When I grow up I’m going to have lots of good babies.”

Me: “You are?”

T: “Yes. All of my babies will be good. I’m not going to have any naughty babies.”

Me (trying not to LOL): “How many babies do you plan to have?”

T: “Lots and lots and lots – a hundred! Or more than that – I can’t even count that high!”

Me: “That is a LOT of babies. Who is going to change all of those diapers?”

T: “Oh. Hundreds of babies will be a lot of work.”

Me: “Yes. That would be a lot of work. And lots of diapers. And you have to feed them.”

T: “Well, I guess my daddy will have to stay home and help me.”

Hear that Alan? You’re going to be a stay-at-home grandpa and help care for your hundreds of good grandchildren. Good thing you work out! :o)


Saturday, June 04, 2011

The Box I Built

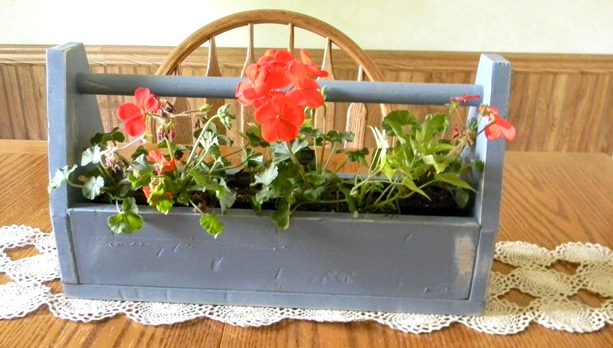
What does a chop saw, a skilsaw, a drill press, and a nail gun all have in common? They’re all power tools I learned to use last weekend when I built this:

DSCN0742

A few weeks ago I read about a challenge to build an old-fashioned toolbox on Funky Junk Interiors. The blog author had a guest post a tutorial with directions and possible dimensions. I showed it to Greg and he was more than happy to help me put this together.

Unfortunately we didn’t have any old wood to use, but there was some leftover pine from a couple of woodworking projects Greg’s been working on. He found enough pieces to put the toolbox together. I kind of pounded on them and sanded a bit of the paint off, and scratched it a little. The handle is just a plain wooden dowel.

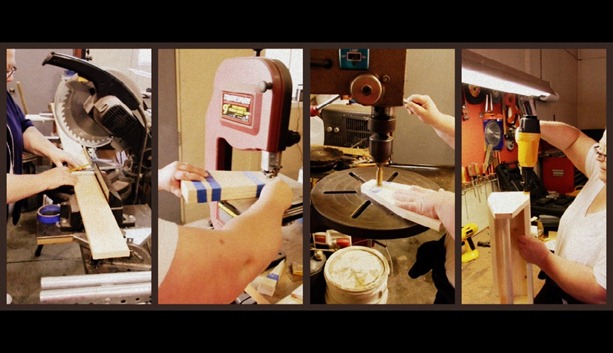
So it took just about an hour for me to get through all of the measuring, cutting, sanding, and nailing. (Less time than it’s taking me to write this blog post…)

toolbox collage

True confession: I’m pretty scared of power tools with sharp blades, so the chop saw was not my favorite thing. You know what I did like? The drill press and the nail gun! I did really well with the Forstner bit on the drill press, cutting out the circular hole for the handle. And that nail gun? Pow-er-ful! I coulda nailed stuff all day long!

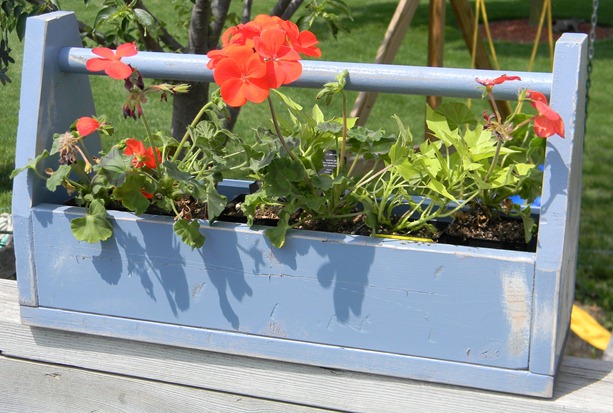
So what will I do with my new creation? There are so many possibilities! I love it with the geraniums:

DSCN0749

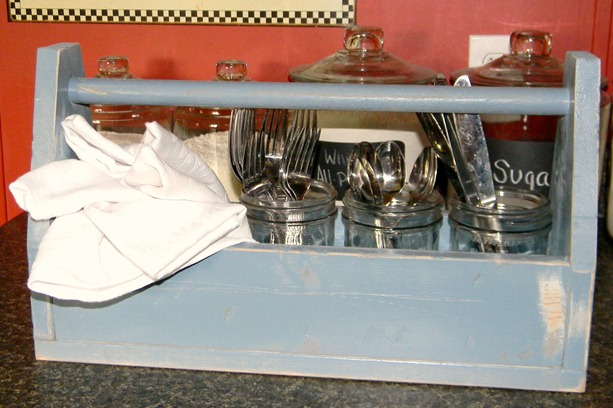
And we can use it for picnics for napkins and utensils:

DSCN0757

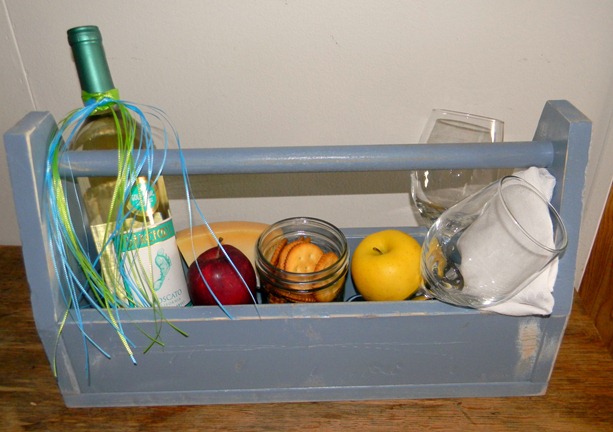
Or use it to take a sweet little picnic out to the fire pit for a relaxing and romantic at-home date:

DSCN0766

Anybody want one for Christmas? Cuz I wanna make some more!

Friday, June 03, 2011

Fun in the high-clouds-overcast-Sun

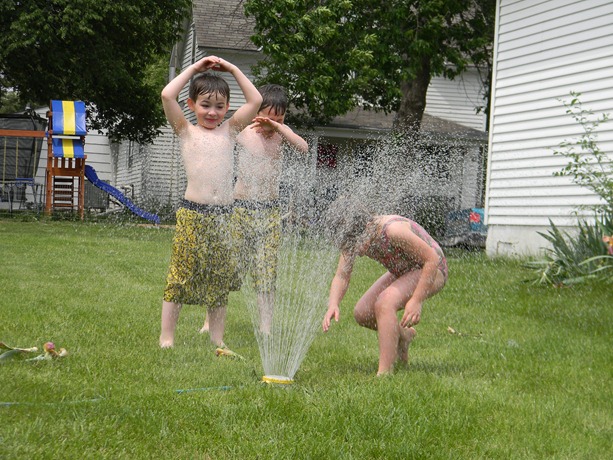
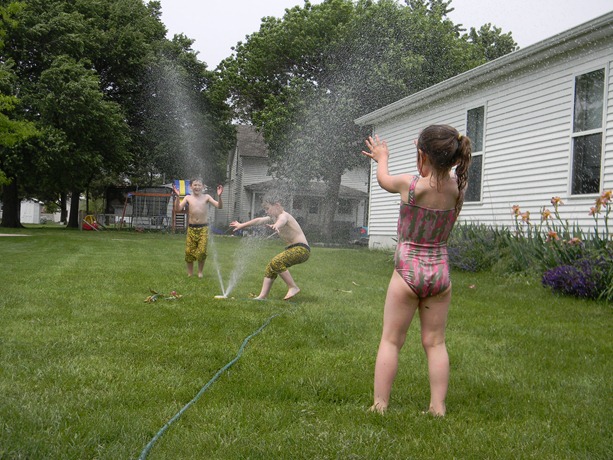
It was a busy day with Randy’s kids here. I invited them to come finish a project they’d started many weeks ago for their garden. Besides that, we had a picnic lunch in the living room, played Wii, and ran through the sprinkler.

It’s already summertime hot here, temps in the 90’s the first week of June. UGH! While I’m not a hot weather lover, there are certain fun things you can do when the mercury gets up there that you cannot comfortably do in the other seasons. One of those things is good, old-fashioned, running through the sprinkler.

DSCN0720

We put it in the yard on the back side of the house and they had a blast. I love watching them develop their own little games and then cooperate and share and take turns. These three will be best friends their whole lives.

(I wish the video was a little longer, but I ran out of memory on my SD card.)

They had a good time experimenting with the different settings on the sprinkler, then, as you saw in the video, they would hold their faces in the spray as long as they could.

They played out here for about half an hour, then it was time to get changed and head to town.

DSCN0727

I guess if we have to have it hot outside, we may as well have a little fun and get a little wet - “we” being “them” of course.

Thursday, June 02, 2011

Gettin’ the Mojo Back

clematis

True confession time: I’ve been a slug. Spending too much time on the computer (have you heard of Pinterest?!), or watching TV, not sleeping well, being exhausted by running after the baby and overwhelmed by everything that I need/want to do around here. Oh, and the clouds and rain and gloom have sucked the energy out of every day.

Fact is, I don’t have Bradley here as often now and there is plenty of time to get things done. I’ve had a couple of nights of good sleep, the weather is beautiful, and the flowers are blooming in my garden. (Don’t you love the photo above? It’s my clematis that is growing on the back deck. It has never bloomed this early before, nor with such big flowers. That one is bigger than my hand.)

I have an online friend whose motto is “If you do stuff, stuff gets done.”

It is time for me to get busy.

There are a few projects in the works and I cannot wait to show you what I did last weekend! I’ll post it on Saturday, but will give you a hint – it involved power tools. And I did not lose a digit!

Off to work…


Wednesday, June 01, 2011

"One day, an Autobot shall rise from our ranks and use the power of the Matrix to light our darkest hour." Optimus Prime

If you know my family at all, you understand that my son, Nick, is a fiercely independent young man. He lives alone, works two jobs, and protectively guards his free time. After his recent hospitalization, though, it didn’t take much to persuade him to spend a few day at our house. He needed some time to adjust to some new things in his daily routine, and I was happy to “baby” him a little. He doesn’t allow me to do that very often…

Nick

One of the changes he has to make is to carry medical supplies with him at all times. We joked about a “man-bag” or “satchel”. He really doesn’t need anything that large, so I looked around the house, but didn’t find anything that worked. Nanny had a small shaving bag, but he vetoed that idea, insisting he’d find something himself.

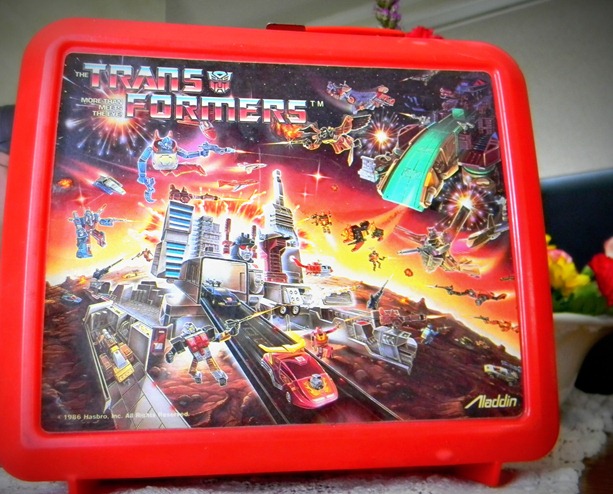
I think he already had plans to use this:

lunch box

When I met up with him on Monday morning for his follow-up doctor visit, this is what he was carrying when he got out of his car.

I love it!

I don’t know why I was surprised, it fits his well-hidden sense of humor perfectly. His original Transformers lunchbox, circa late 1980’s (he has the original Thermos container for it, too), works perfectly for the assorted things that must be kept with him.

His new diagnosis is not his “darkest hour” but I liked the quote used for the title of this post as a way to say Nick still has his sense of humor and, I think, takes some comfort in this childhood keepsake. Perhaps it’s also a way to integrate this new facet of his life into the old. Accept it and move on without over-thinking things. That’s the way Nick is.